In the next article I will describe the steps to install the Download Manager pyLoad in a hard Synology disk. In my case, a Ds111 Synology disk, with ARM Cpu.
The process of installation and configuration information has been obtained from the following pages :
http://setaoffice.com/2011/04/10/how-to-install-pyload-on-a-synology-diskstation-ds211j/
http://forum.synology.com/enu/viewtopic.php?f=38&t=34051
http://www.synology-wiki.de/index.php/PyLoad
http://nas-tweaks.net/220/installation-of-pyload-on-optware/
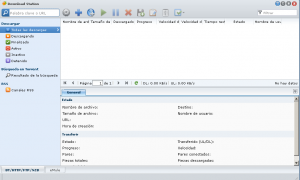
The Download Manager integrated into DiskStation "Download Station"" (See), allows multiple formats download : BitTorrent, FTP, HTTP, eMule, RapidShare, Megaupload, etc.
Not bad, the problem is that the download files from sites like RapidShare or Megaupload, It is only possible through Premium accounts.
Looking for an alternative, to download this type of sites, without Premium accounts, I found the software pyLoad; and information to install and configure it in a Synology Nas drive.
As a prerequisite, It is necessary to have modified the Synology Server, to install packages ipkg; the steps were described in a previous article (See).
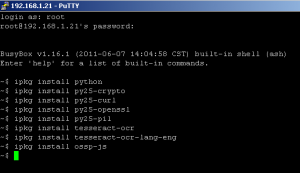
We connect by Ssh, and instaleramos packages "python", py25-crypto, py25-curl, py25-openssl, py25-pil, tesseract-ocr, tesseract-ocr-lang-eng, OSSP js" with the commands :
ipkg install python
ipkg install py25-crypto
ipkg install py25-curl
ipkg install py25-openssl
ipkg install py25-pil
ipkg install tesseract-ocr
ipkg install tesseract-ocr-lang-eng
ipkg install ossp js
ipkg install unrar
Then download the source files of the latest version of pyLoad :
CD/opt
wget http://get.pyload.org/get/src/0.4.6/
unzip pyload-src-v0.4.6.zip
RM pyload-src-v0.4.6.zip
cd pyload/
A continuación cambiaremos el directorio de configuración :
cd module/config/
echo "/volume1/pyload" >> configdir
Daremos permisos de ejecución a pyLoad :
chmod x /opt/pyload/pyLoadCore.py
Iniciaremos pyLoad :
python /opt/pyload/pyLoadCore.py
Al ser la primera ejecución, se iniciará el asistente de configuración, el cual se entiende bastante bien, aunque aquí os dejo el Asistente en Ingles :
|
A continuación, crearemos el script de inicio, para que el Servicio pyLoad se inicia automáticamente al encender el disco.
Para ello, crearemos el script en la carpeta /opt/etc/init.d/ :
nano /opt/etc/init.d/S99pyload.sh
Código del Script :
| #!/bin/sh # # Start / Stop Script for PyLoad http://localhost:8000 # prefix="/opt" PATH=${prefix}/bin:${prefix}/sbin:/sbin:/bin:/usr/sbin:/usr/bin NAME="PyLoad" DAEMON="python /opt/pyload/pyLoadCore.py –daemon" DAEMON_OPTS="" # # start() { echo "Starting Service: $NAME" $DAEMON $DAEMON_OPTS | awk '{print $3}' >/var/run/pyload.pid } # stop() { kill `cat /var/run/pyload.pid` } # case "$1" in start) start ;; stop) stop ;; restart) stop sleep 4 start ;; *) echo "Usage: $0 (start|stop|restart)" exit 1 ;; esac # # End |
Daremos permisos de ejecución al script de inicio :
chmod x /opt/etc/init.d/S99pyload.sh
We can create an icon for accessing the Web administration of pyLoad, Since the DiskStation Panel (DSM)
CD /usr/syno/synoman/webman/3rdparty
wget http://DL.dropbox.com/u/3001640/webman.pyload.tar.gz
tar xvfz webman.pyload.tar
RM webman.pyload.tar
But we have configured access to the website of pyLoad with the port by default (8000), We will have to edit the application.cfg configuration file ; and change the parameter port :
Nano /usr/syno/synoman/webman/3rdparty/pyload/application.cfg
* At the time of writing this article, newly available version 0.4.6, and also in format ipkg ( http://pyload.org/download )
I have not had time to test the installation (much more simple), but the installation commands would be the following :
ipkg install tesseract-ocr tesseract-ocr-lang-eng ossp js unrar
wget http://get.pyload.org/static/pyload-v0.4.6-noarch.ipk
ipkg install pyload-v0.4.6-noarch.ipk
pyLoadCore -s
El ultimo comando es el de configuración.


Thank you for sharing your thoughts. I truly appreciate your efforts and I am waiting for your further post thanks once again.
Ricardo very good your explanation, currently buy a Synology NAS 712+, and I see that your publicaiocn has already been more than one year. I wanted to know that so outdated is encuantra with all the changes that are currently at Synology DSM. As now be there to install a Python package, from what I see is the same company as Pyload (corregime if I'm wrong) will be more easy installation if install you this package?. Sorry for my ignorance. I hope your answer.
Thanks a lot
When I wrote the article, the IPK package was not available; and I wrote it for the process have annotated, If I had that repeat it.
The best choice, is to install the IPK package, with the commands that are listed in the pyLoad download page : http://pyload.org/download
You may need to install some packages before :
ipkg install python py25-crypto py25-curl py25-openssl py25-pil tesseract-ocr tesseract-ocr-lang-eng ossp-js unrarI would like to uninstall the pyload. Could you write a manual and tell me how I can uninstall it??
Thanks a lot.
If installed with the ipk package, you would have that run a command similar to :
ipkg remove pyload-v0.4.6-noarch.ipk
But, you would have that follow these steps (commands from the shell) :
1- Stop pyLoad with : /opt/etc/init.d/S99pyload.sh stop
2- Delete the pyLoad folder : RM - R /opt/pyload
3- Delete the startup script : RM /opt/etc/init.d/S99pyload.sh